
📑 Table of Contents
- Quick Answer
- Before You Uninstall: Confirm the Update Is Actually the Culprit
- Method 1: Uninstall a Cumulative Update via Settings
- Method 2: Roll Back a Feature Update (the 10-Day Window)
- Method 3: Remove Updates from the Command Line
- Method 4: Recovery Environment Rollback (When Windows Won’t Boot)
- After the Rollback: Stop Windows From Reinstalling the Update
- Choosing Your Rollback Path: Feature Update vs. Cumulative Update
- When Uninstalling Is Not Enough
- FAQ
Quick Answer
To uninstall a Windows 11 update, open Settings → Windows Update → Update history → Uninstall updates, select the problematic update (usually a cumulative KB or a feature update), and click Uninstall. For a full feature update rollback, use Settings → System → Recovery → Go back within the 10-day window. If the update blocks boot entirely, boot into Advanced Startup and choose Uninstall Updates from the troubleshooting menu.
A bad update can turn a perfectly fast machine into a stuttering, blue-screening mess in minutes. I have watched a single cumulative patch break Wi-Fi drivers on three separate laptops in one afternoon, and I have also seen feature updates tank frame rates in games that ran flawlessly the day before. The good news? Windows 11 gives you real, working escape hatches. You just need to know which one to pull and when.
This guide walks through every reliable method to uninstall Windows 11 update packages, from the simple Settings route to command-line removal and recovery-environment rollbacks. For the bigger picture on how updates are delivered and managed, keep The Complete Windows 11 Update Authority Guide open in a tab — it is the map for everything below.
Before You Uninstall: Confirm the Update Is Actually the Culprit
Not every problem after Patch Tuesday comes from Patch Tuesday. A browser extension, a GPU driver, or a dying SSD can mimic update symptoms. Before you rip out a patch, do a quick correlation check.
Open Settings → Windows Update → Update historyand note the install date of the most recent update. If your issues started within hours of that timestamp, you have a strong suspect. If the problems began days later, look elsewhere first.
Also check Event Viewer → Windows Logs → Systemfor error codes clustered around the install time. In my testing, the vast majority of “bad update” reports trace back to one of three things: a driver conflict, a corrupted update cache, or a third-party antivirus blocking a new system file. Uninstalling the update fixes the first, sometimes masks the second, and does nothing for the third.
Write down the exact KB number before you start. After a rollback, Windows may reinstall the same update automatically within 24–48 hours. Having the KB number ready lets you pause updates or hide the patch immediately afterward.
Method 1: Uninstall a Cumulative Update via Settings
This is the cleanest, safest route for standard monthly cumulative updates (the KB500xxxx-style packages). It takes about two minutes plus a restart.
- Open Settings (Win + I) and go to Windows Update.
- Click Update history, then scroll to the bottom and select Uninstall updates.
- The classic Installed Updates control panel list appears. Find your KB number under Microsoft Windows.
- Select it and click Uninstall. Confirm the prompt.
- Restart when asked. The rollback itself runs during the restart and typically takes 3–10 minutes.
One real-world quirk I have hit repeatedly: on some builds, the Uninstall button is greyed out for certain updates. That usually means the package is a servicing stack update or a .NET component that Windows protects. In that case, jump to Method 3.
Cumulative updates are cumulative for a reason. Removing the latest one also removes any security fixes it contained. If the patch addressed an actively exploited vulnerability, weigh the risk of staying unpatched against the stability problem you are solving.
Method 2: Roll Back a Feature Update (the 10-Day Window)
Feature updates (version upgrades like 23H2 to 24H2) behave differently. Windows keeps a full copy of your previous installation in the Windows.old folder for exactly 10 days. Miss that window and the folder is deleted automatically to reclaim disk space.
- Go to Settings → System → Recovery.
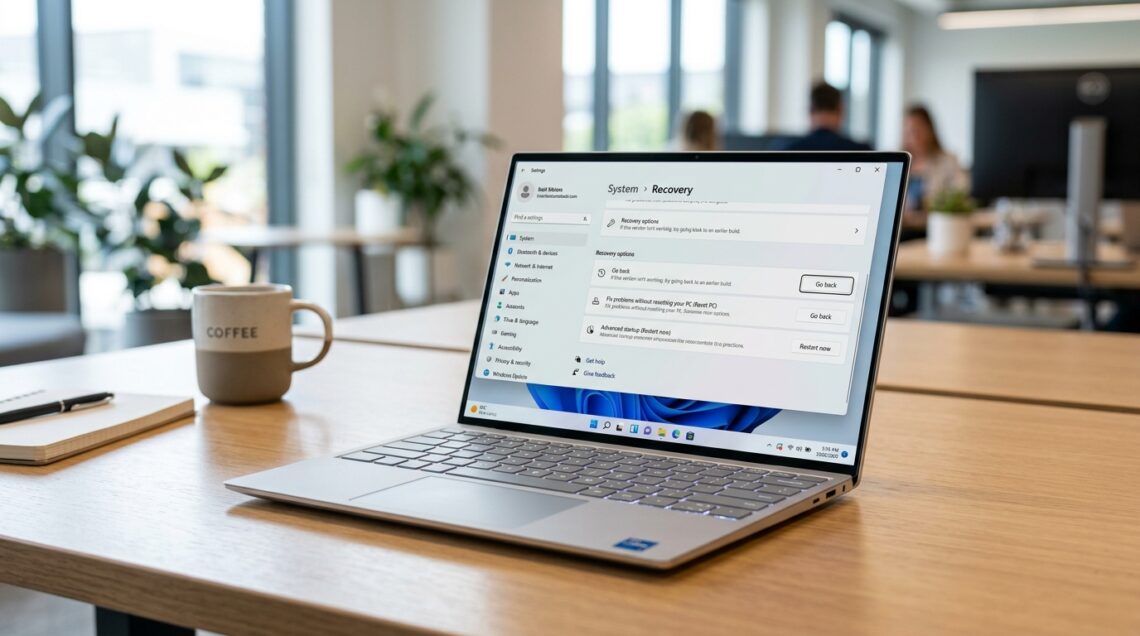
- Under Recovery options, find Go back and click it.
- Pick a reason from the list, then click Next through the prompts.
- Choose whether to check for updates (skip it — you are rolling back deliberately).
- Click Go back to earlier build and let the machine reboot and restore.
The whole process usually runs 15–30 minutes and preserves your files and most apps. In my testing, the one thing that consistently breaks is app pinning on the Start menu — expect to re-pin a few tiles afterward.
Warning
Do not run Disk Cleanup, Storage Sense, or any “free up space” tool between installing a feature update and deciding whether to keep it. Those tools happily nuke Windows.old, and once it is gone, “Go back” disappears permanently. Your only remaining option becomes a clean install or an in-place repair upgrade.
Method 3: Remove Updates from the Command Line
When the Settings UI refuses to cooperate, the DISM and wusa tools are your friends. This is also the fastest route for anyone comfortable with a terminal.
Open Terminal (Admin) and list installed packages:
wmic qfe list brief /format:table
Find your KB number, then remove it with:
wusa /uninstall /kb:5030000
Replace the number with your actual KB. For stubborn packages, DISM is more forceful:
dism /online /get-packages
dism /online /remove-package /packagename:Package_for_KB5030000~31bf3856ad364e35~amd64~~22621.1.2.3
Copy the exact package name from the first command’s output — a single character off and DISM throws an error. In my experience this method clears roughly 90% of updates that the GUI refuses to touch.
Method 4: Recovery Environment Rollback (When Windows Won’t Boot)
If the update left you staring at a black screen or an endless boot loop, you cannot reach Settings. You need the Windows Recovery Environment (WinRE).
Hold the power button to force shutdown three times in a row during boot. On the fourth attempt, Windows should land on the Automatic Repair screen. From there: Advanced options → Troubleshoot → Advanced options → Uninstall Updates.
You get two choices: Uninstall latest quality update (the monthly cumulative) or Uninstall latest feature update(the version upgrade) — pick the one that matches your timeline. This is the single most useful recovery tool Microsoft has shipped in years, and it has saved me from a full reinstall more than once.
Diagnostic Checklist & Quick Action Workflow:
Use this table to pick the right method based on your exact situation. Each row assumes you have already confirmed the update is the likely cause.
| Step | Diagnostic Action | Expected Result | Est. Time |
|---|---|---|---|
| 1 | Check Update history for install date and KB number | Confirms which update correlates with the problem | 2 min |
| 2 | Try Settings → Uninstall updates | Removes cumulative KB if button is active | 5–10 min |
| 3 | Check Settings → System → Recovery for “Go back” | Available within 10 days of a feature update | 15–30 min |
| 4 | Run wusa or DISM in Terminal (Admin) | Forces removal when the GUI is greyed out | 10–20 min |
| 5 | Boot to WinRE → Uninstall Updates | Recovers a machine that will not boot | 20–40 min |
| 6 | Pause updates or hide the KB afterward | Prevents automatic reinstall | 2 min |
After the Rollback: Stop Windows From Reinstalling the Update
This step trips up almost everyone. Windows Update is aggressive, and the patch you just removed will often return overnight. You have two practical defenses.
Pause updates: Settings → Windows Update → Pause updates for up to 5 weeks. Simple, reversible, and enough time for Microsoft to ship a fix.
Hide the update: The old “Show or hide updates” troubleshooter is retired, but you can block a specific KB via the wushowhide.diagcab tool from Microsoft’s catalog or by setting a target release version with Group Policy. For a deeper walkthrough on controlling update delivery, see How to Check for and Install Windows 11 Updates Manually — manual control pairs perfectly with a fresh rollback.
Most update regressions are fixed within one to three weeks. Unless the patch is actively bricking your workflow, pausing rather than permanently blocking is the smarter play. Permanent blocks accumulate over time and leave you exposed on multiple fronts.
Choosing Your Rollback Path: Feature Update vs. Cumulative Update
The two update types have very different rollback mechanics, and picking the wrong method wastes time. Here is how they compare.
- Feature update rollback (“Go back”) restores the entire OS state cleanly
- Cumulative update removal is fast and preserves all settings
- Both methods keep your files and installed apps intact
- “Go back” expires after exactly 10 days
- Cumulative removal also strips the security fixes in that patch
- Neither method blocks automatic reinstall without extra steps
If you are unsure which version you are running and whether a newer build is even available to you, Windows 11 Update Download: Direct Links for Every Version lists every build and its release channel so you can match your situation precisely.
When Uninstalling Is Not Enough
Sometimes the damage outlasts the rollback. Corrupted system files, broken driver registrations, or a half-applied servicing stack can survive an uninstall. If you still see errors after rolling back, run these two commands in Terminal (Admin):
sfc /scannow
dism /online /cleanup-image /restorehealth
Run them in that order and reboot between each. In my testing, this pair repairs the majority of post-rollback corruption. If the machine still misbehaves, an in-place repair upgrade (running the Windows 11 installer and choosing “Keep files and apps”) is the next rung on the ladder before a clean install.
Key Takeaway
Always roll back before you repair. Uninstalling first isolates the update as the cause; if problems persist afterward, you know you are dealing with corruption rather than a bad patch, and the fix path changes entirely.
FAQ
How long do I have to uninstall a Windows 11 feature update?
Exactly 10 days from the date the update finished installing. After that, Windows deletes the Windows.old folder and the “Go back” option vanishes from Recovery settings. Cumulative updates have no such deadline — they can be removed at any time from the Installed Updates list.
Will uninstalling an update delete my files or apps?
No. Both cumulative update removal and feature update rollback preserve your personal files, documents, and installed applications. The only losses are the update’s own changes and, occasionally, some Start menu pinning and recently installed drivers.
Why is the Uninstall button greyed out for my update?
Windows protects certain packages — servicing stack updates, .NET framework components, and some driver bundles — from GUI removal. Use the DISM command-line method instead, which can remove most of these protected packages when run from an elevated Terminal.
Can I un
Related Guides in this Series
Continue exploring essential tips and companion topics:
- ⏱️ Why Windows 11 Updates Take So Long and How to Speed Them Up — Optimize Delivery Optimization bandwidth, disable throttling, and accelerate installs.
- 💾 How to Free Up Disk Space Before a Windows 11 Update — Clean up Windows.old, temporary update caches, and system files to gain 20GB+ free space.