
📑 Table of Contents
- What the Media Creation Tool Actually Does
- What You Need Before You Start
- Step-by-Step: Building the Bootable USB
- Diagnostic Checklist and Quick Action Workflow
- Verifying the Drive Actually Boots
- When the Media Creation Tool Isn’t the Right Choice
- Common Errors and How I Fix Them
- Frequently Asked Questions
The Media Creation Tool builds a clean Windows 11 bootable USB in about 25–40 minutes on a decent connection. You need an 8GB+ USB stick, a stable internet link, and admin rights. Run the tool, pick “Create installation media,” choose your USB, and let it finish — no Rufus, no ISO hunting, no command-line fiddling required. Making a **Windows 11 bootable USB** sounds like a job for a power user. It isn’t. Microsoft’s own Media Creation Tool handles the whole thing in a handful of clicks, and honestly, it’s the method I reach for first whenever I’m prepping a machine for a clean install. This walkthrough covers the exact steps, the snags I’ve hit in the field, and how to verify the drive actually boots before you wipe anything. If you’re still mapping out the broader download picture, keepThe Complete Windows 11 Download Authority Guide open in another tab — it’s the hub for everything else here.
What the Media Creation Tool Actually Does
What You Need Before You Start
Get these sorted first. Skipping this step is the number one reason people waste an hour staring at a failed install. – **A USB drive of 8GB or larger.** 8GB is the floor; 16GB gives you breathing room. Everything on it gets erased. – **A stable internet connection.** The download is roughly 5–6GB. A flaky Wi-Fi link can corrupt the process mid-write. – **Administrator rights** on the PC you’re running the tool from. – **A spare 30–45 minutes** you don’t need the computer for. > [!WARNING] > The tool wipes your USB completely. I’ve watched people lose years of photos because they grabbed “that 64GB stick in the drawer” without checking. Back up anything on the drive first, then format it to FAT32 or NTFS before running the tool — it saves a surprising number of errors.Step-by-Step: Building the Bootable USB
Here’s the workflow I follow, refined after dozens of installs across different hardware. **Step 1 — Download the tool.** Head to Microsoft’s official Windows 11 download page and grab the Media Creation Tool executable. Run it — accept the license terms when prompted. **Step 2 — Choose your media type.** The tool asks whether you want to “Upgrade this PC now” or “Create installation media for another PC.” Pick the second option. The first is for in-place upgrades, not fresh installs. **Step 3 — Set language and edition.** Select your language, Windows 11 edition, and architecture. If you’re unsure about architecture, leave “Use the recommended options for this PC” ticked — but double-check it matches your target machine, not just the one you’re sitting at. **Step 4 — Select USB flash drive.** Choose “USB flash drive” as your media type. The tool lists every connected drive — pick the right one. This is where a mislabeled stick causes heartbreak. **Step 5 — Let it download and write.** The tool downloads Windows 11, then writes it to the drive. This is the long part — 20 to 40 minutes depending on your connection and USB speed. Don’t unplug anything — don’t let the PC sleep. **Step 6 — Finish and verify.** When it says “Your USB flash drive is ready,” click Finish. Then verify the drive contains a `sources` folder and a `bootmgr` file — those confirm a proper write. > [!PRO_TIP] > Use a USB 3.0 drive plugged into a rear port, not a front-panel hub. I’ve seen front-panel ports drop the connection mid-write on older cases, producing a drive that looks fine but fails at boot. Rear ports on the motherboard are far more reliable.Diagnostic Checklist and Quick Action Workflow
Something went wrong? Run through this before you start over from scratch. Most failures trace back to one of these four issues, and each has a fast fix. | Step | Diagnostic Action | Expected Result | Est. Time | |——|——————-|—————–|———–| | 1 | Confirm USB is 8GB+ and fully formatted | Drive shows correct capacity, no errors | 2 min | | 2 | Check internet stability with a speed test | Consistent 10Mbps+ download | 3 min | | 3 | Re-run tool as Administrator | No permission prompts mid-process | 1 min | | 4 | Verify `sources` folder and `bootmgr` on drive | Both present after completion | 1 min | | 5 | Test boot on target PC via boot menu | Windows Setup screen appears | 5 min |Verifying the Drive Actually Boots
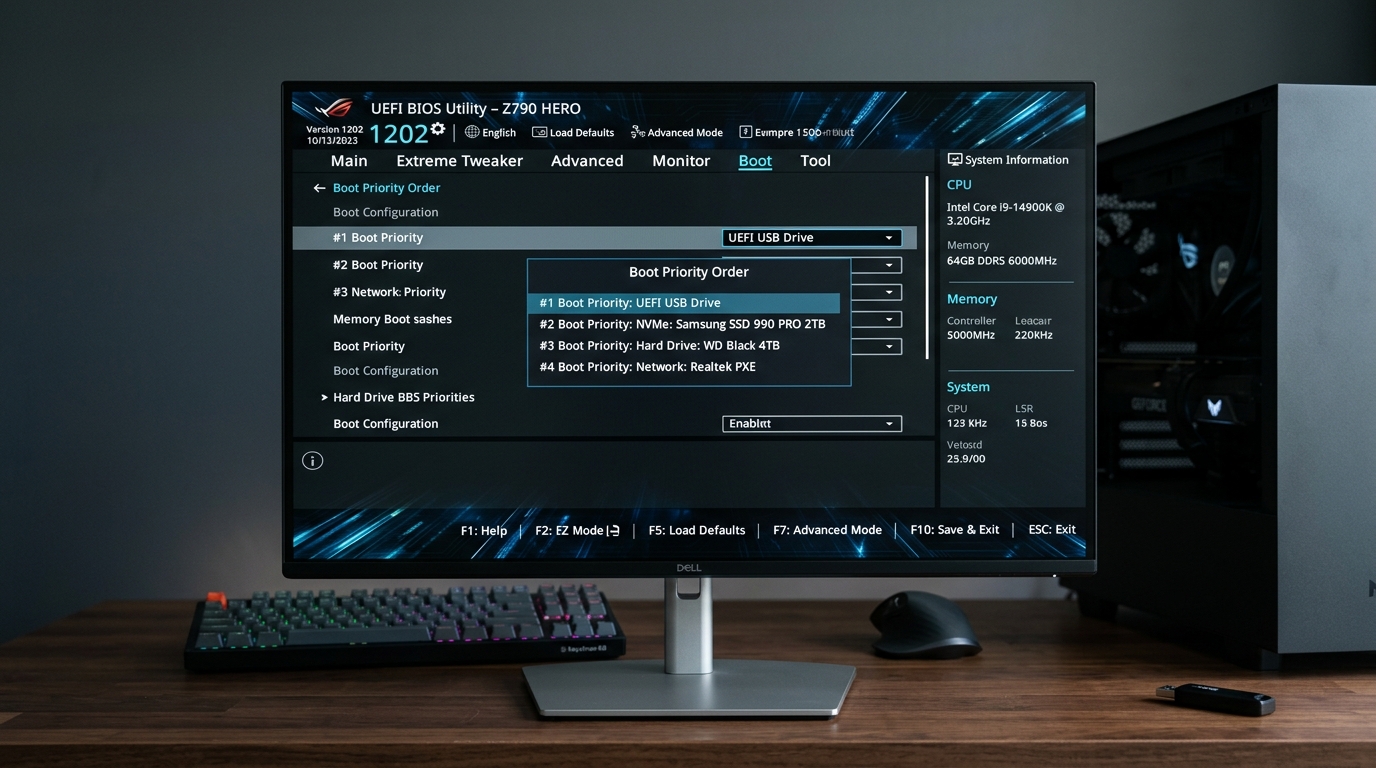
Don’t assume success just because the tool said so. Test it. Reboot your target machine and hammer the boot menu key — F12 on most Dells, F9 on HP, Esc on many ASUS boards. Select the USB drive from the list — if Windows Setup loads, you’re golden. If the drive doesn’t appear, jump into BIOS and check two things: Secure Boot state and boot order. > [!IMPORTANT_NOTE] > Windows 11 requires UEFI firmware with Secure Boot and TPM 2.0. If your target PC is older or has Secure Boot disabled, the installer may refuse to proceed. Enable both in BIOS before booting, or the USB will load Setup and then block you at the compatibility check. Here’s the thing most guides skip: a USB that boots fine on your test machine can fail on the target. Different firmware, different quirks. I always test on the actual machine I’m installing to when I can.When the Media Creation Tool Isn’t the Right Choice
The tool is great — for most people, most of the time. But it has real limits, and knowing them saves headaches.- Official Microsoft tool, no third-party risk
- Handles UEFI and legacy BIOS automatically
- Always pulls the current build
- Single executable, no ISO management
- Requires a live internet connection during the whole write
- Can’t pin an older Windows 11 build
- No control over partitioning scheme
- Occasionally stalls on slower connections
Common Errors and How I Fix Them
A few failures show up again and again. Here’s my field-tested playbook. **”We can’t create the media” error.** Usually a USB formatting issue. Reformat to FAT32, then retry. If it persists, try a different drive entirely — some cheap sticks have flaky controllers. **Tool hangs at 0% or stalls mid-download.** Your connection dropped or a proxy is interfering. Disconnect VPNs, switch to a wired connection, and restart. **USB not detected by the tool.** Unplug and replug the drive, or try a different port. Windows sometimes doesn’t refresh the drive list until you do. **Setup loads but can’t find the drive to install to.** That’s a storage driver issue on newer laptops with NVMe drives, not a USB problem. You’ll need to load drivers during Setup — a separate headache entirely. > [!OUR_VERDICT] > The Media Creation Tool earns a solid 8.5/10 for everyday use. It’s the fastest path from zero to a working Windows 11 bootable USB for a single machine. Power users deploying at scale should keep the ISO method in their back pocket.Frequently Asked Questions
**Can I make a Windows 11 bootable USB on a Mac?** Not with the Media Creation Tool — it’s Windows-only. You’d need to download the ISO and write it with a tool like BalenaEtcher or use a Windows VM. The ISO route is your only real option there. **How big should my USB drive be?** 8GB minimum, but I recommend 16GB. The current Windows 11 image runs around 5–6GB, and a little headroom prevents write errors on drives that report slightly less usable space than advertised. **Will the Media Creation Tool erase my USB drive?** Yes, completely. Every file gets wiped during the process — back up first, always. **Does the bootable USB work on both UEFI and legacy BIOS PCs?** The tool configures the drive to handle both, but Windows 11 itself requires UEFI with Secure Boot and TPM 2.0. So while the USB is dual-capable, the operating system won’t install on legacy-only hardware without workarounds. — That’s the whole process. Grab a clean 8GB+ stick, run the tool as admin, pick your USB, and wait. Test the boot before you commit, and keep themaster download guide handy for anything this walkthrough didn’t cover.Related Guides in this Series
Continue exploring essential tips and companion topics: