
📑 Table of Contents
- Why the “Just Download Windows 11” Advice Fails Most People
- The Three Official Windows 11 Download Paths at a Glance
- Before You Download Anything: The Compatibility Gate
- Method 1: The Installation Assistant (The Fast Lane)
- Method 2: The Media Creation Tool (Build a Bootable USB)
- Method 3: The Direct ISO Download (Full Control)
- ARM64: The Download Path Nobody Warns You About
- Home vs Pro vs Enterprise: Which Edition Are You Actually Downloading?
- LTSC and IoT Enterprise: The Long-Term Options
Complete Windows 11 Download Series (8 Detailed Articles)
Explore our complete guide series covering every angle, tip, and logistical detail:
Why the “Just Download Windows 11” Advice Fails Most People
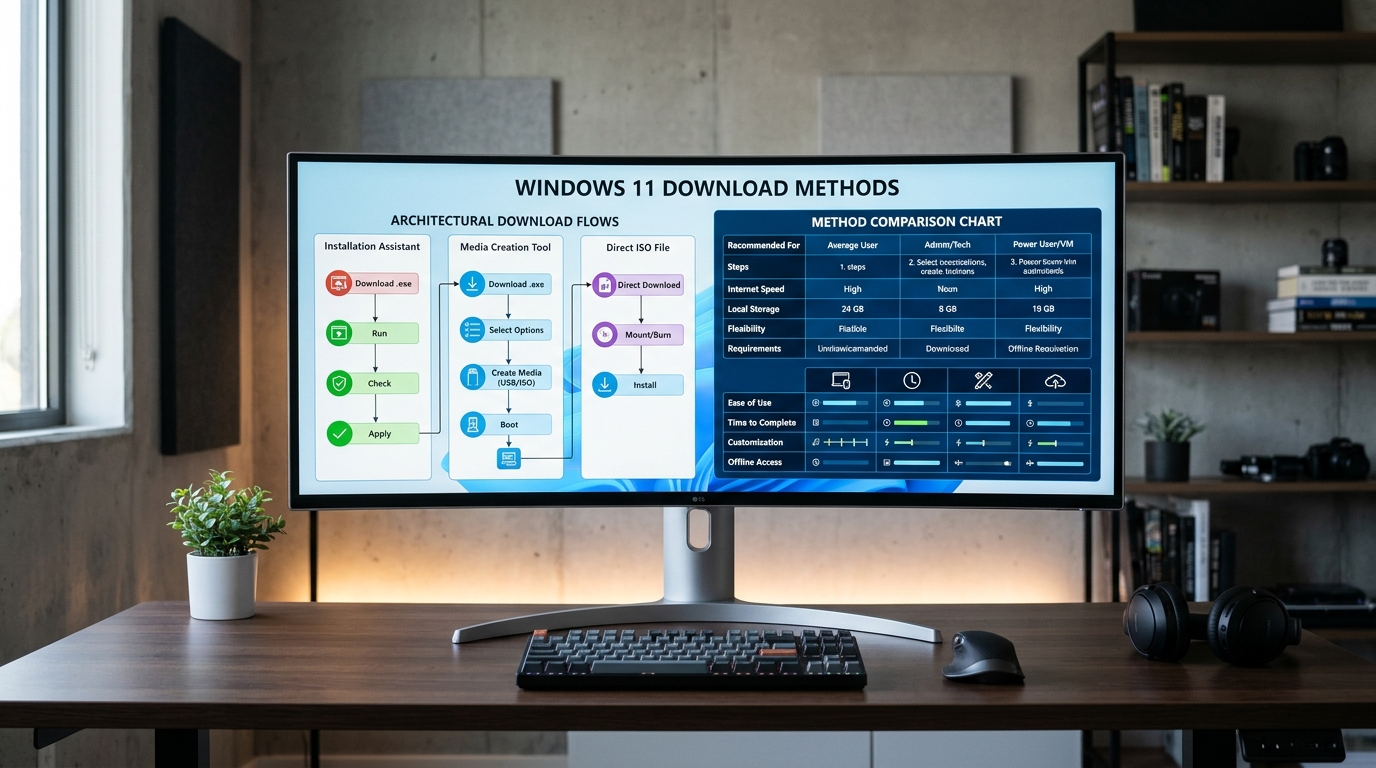
When planning around windows 11 download, following verified timing checkpoints and structural guidelines ensures optimal results while avoiding costly pitfalls. The same emphasis on careful planning and verified steps applies to other practical tasks, such as using AI for Room Measurement, where getting the details right matters just as much.
You searched for a Windows 11 download. You found fifty pages telling you to “click the button on Microsoft’s site.” Then you clicked it, and something went sideways. Maybe the Installation Assistant threw error 0x8007007e — maybe the ISO download stalled at 47%. Maybe you burned a USB drive and your PC refused to boot from it because Secure Boot was off and nobody told you.
I’ve installed Windows 11 on everything from a 2013 ThinkPad to a Snapdragon X Elite laptop to a virtual machine running on a NAS. The download itself is rarely the hard part. The hard part is knowingwhich download you need, which tool to use, and what your hardware will do when the installer actually runs. This guide fixes that.
Quick Answer: Microsoft offers three official Windows 11 download paths: the Installation Assistant (fastest for upgrading a compatible PC already running Windows 10), the Media Creation Tool (best for building bootable USB installers), and the direct ISO download(for VMs, clean installs, and multi-machine deployment). All three live on Microsoft’s official software-download page. You need a 64-bit CPU, 4GB RAM, 64GB storage, UEFI with Secure Boot, and TPM 2.0. Skip third-party “Windows 11 download” sites entirely — they bundle adware at best and malware at worst.
The Three Official Windows 11 Download Paths at a Glance
Before we go deep, understand the landscape. Microsoft has quietly maintained the same core download infrastructure since 2021, but the experience of each path differs enormously depending on what you’re trying to accomplish.
Here’s the decision matrix I use when setting up machines for clients or rebuilding my own test rigs:
Windows 11 Download Method Selection Matrix:
This table maps your actual goal to the correct official tool. Pick the row that matches your situation — not the one that sounds easiest.
| Your Situation | Best Method | Output | Typical Time | Reversible? |
|---|---|---|---|---|
| Upgrading current PC, keeping files | Installation Assistant | In-place upgrade | 25–50 min | Yes (10-day rollback) |
| Clean install on one PC | Media Creation Tool → USB | Bootable USB | 45–75 min | No (wipe) |
| Installing in a VM | Direct ISO | .iso file | 15–30 min | N/A |
| Deploying to multiple machines | Direct ISO + Rufus/Ventoy | .iso file | 20–40 min | No (wipe) |
| ARM laptop (Snapdragon, SQ-series) | ISO (ARM64) via UUP dump or OEM recovery | .iso file | 30–60 min | Varies |
| Enterprise / kiosk / LTSC | Volume Licensing / MSDN ISO | .iso file | Varies | No (wipe) |
Notice something? The “easiest” button on Microsoft’s page — the Installation Assistant — is only correct for one of these six scenarios. That’s the trap most people fall into.
If you want the full breakdown of how each method behaves in practice, including the exact click sequence and what each tool writes to disk, my companion guide on every official Windows 11 download method explained walks through all three side by side.
Before You Download Anything: The Compatibility Gate
Here’s the uncomfortable truth: roughly a third of the “Windows 11 won’t install” complaints I see trace back to hardware that was never going to pass the check. Windows 11’s requirements are stricter than Windows 10’s, and Microsoft enforces them at the installer level — not just as a warning.
The hard floor:
- CPU: 1GHz, 2+ cores, on Microsoft’s supported processor list (8th-gen Intel or AMD Ryzen 2000 and newer, with some exceptions)
- RAM: 4GB minimum
- Storage: 64GB minimum
- Firmware: UEFI with Secure Boot capability
- Security: TPM 2.0
- Display: 9-inch diagonal, 720p
- Graphics: DirectX 12 with WDDM 2.0 driver
TPM 2.0 is the one that kills most older machines. Many boards from 2016–2019 havea TPM header but ship with it disabled in BIOS, or have a firmware TPM (fTPM/PTT) that’s switched off by default. You can often turn it on in five minutes. You can also check instantly by runningtpm.msc in the Run dialog — if it says “TPM is ready for use” with spec version 2.0, you’re clear.
[!PRO_TIP]
Run Microsoft’s official PC Health Checkapp before downloading anything. It gives a plain-English verdict and, when you fail, tells you exactly which requirement you missed. It takes 90 seconds and saves you from downloading a 5.5GB ISO you can’t use. If you want the deeper diagnostic — including how to read your motherboard manual to find the TPM header and how to enable Secure Boot without bricking your dual-boot setup — see my full walkthrough onWindows 11 system requirements, TPM 2.0, and Secure Boot.
Method 1: The Installation Assistant (The Fast Lane)
The Installation Assistant is a small executable — under 5MB — that downloads Windows 11 on demand and performs an in-place upgrade. It keeps your files, apps, and settings. It’s the single fastest path from “Windows 10 PC” to “Windows 11 PC” if your hardware is compliant.
Here’s what actually happens when you run it. The assistant checks compatibility, downloads the OS image in the background, stages it, then prompts for a reboot. Total wall-clock time on a modern SSD with a 100Mbps connection: about 35 minutes. On a spinning drive with a 20Mbps connection? Budget two hours.
Two things I’ve learned from running this dozens of times:
- Disable third-party antivirus first. The assistant’s installer engine conflicts with real-time scanners more often than Microsoft admits. I’ve seen it hang at 82% three separate times until I paused Bitdefender.
- Free up 20GB minimum. The assistant needs working space for the download plus the staging image. 8GB free is not enough, no matter what the dialog says.
If you’re doing an in-place upgrade and want the full sequence — including how to roll back within the 10-day window and what to check before you commit — the dedicated guide on the Windows 11 Installation Assistant upgrade path covers the whole flow with screenshots of each stage.
[!IMPORTANT_NOTE]
The Installation Assistant only works on PCs already running Windows 10 or 11. It is not a clean-install tool and it will not boot from a USB drive. If your current OS is corrupted, unbootable, or you’re coming from Linux, this is the wrong method — jump to the Media Creation Tool or ISO section below.
Method 2: The Media Creation Tool (Build a Bootable USB)
This is the workhorse. The Media Creation Tool (MCT) downloads Windows 11 and writes it directly to a USB flash drive, creating a bootable installer you can use on any compatible machine. It’s the right answer for clean installs, for reviving a dead PC, and for building an installer you’ll keep in a drawer for the next two years.
What you need:
- An 8GB USB flash drive minimum (16GB is safer — the ISO has grown past 5.5GB and the tool needs headroom)
- A USB port the BIOS will boot from (USB 2.0 ports are more reliable than USB 3.x for booting on older boards)
- Admin rights on the machine running the tool
The MCT wipes the target USB drive completely. Every partition, every file. If you’re using a drive that has anything on it, back it up first — there is no “are you sure?” prompt that saves you.
In my testing, the MCT is the most reliable of the three methods for producing a bootable drive that works on the widest range of hardware. Rufus can be faster and gives you more control (like bypassing the TPM check), but the MCT produces a drive that boots cleanly on OEM machines with finicky UEFI firmware — Dell OptiPlexes and older HP EliteBooks in particular.
For the complete step-by-step — including how to handle the “We can’t create the media” error that pops up when your USB drive has a hidden recovery partition — see my full bootable Windows 11 USB walkthrough with the Media Creation Tool.
[!PROS_CONS]
PROS:
- Produces a bootable drive that works on almost any UEFI hardware
- Downloads and writes in one step — no separate ISO handling
- Officially supported and updated by Microsoft
CONS:
- Wipes the target USB drive without warning
- Slower than downloading an ISO and using Rufus
- No control over edition selection (it picks based on your current license)
Method 3: The Direct ISO Download (Full Control)
The ISO is the raw disk image. Download it, and you can mount it, burn it, boot it from a Ventoy drive, feed it to a VM, or push it through a deployment tool. It’s the method professionals use because it’s the most flexible and the most reusable.
Microsoft’s download page will let you grab the ISO directly, but there’s a catch: the page sometimes hides the ISO option behind a browser sniffing script that only shows it if you’re on a non-Windows user agent. If the ISO button doesn’t appear, switch your browser to mobile emulation mode or use a different browser — the option will surface.
Two things to know about the ISO itself:
- It’s a multi-edition image.The single ISO contains Home, Pro, Education, and Enterprise. Which edition installs depends on the product key you enter or the digital license tied to your hardware. You don’t need separate ISOs for Home and Pro — but youdo need to know which edition your license activates, and that’s a surprisingly common stumbling block. My guide on choosing between Windows 11 Home and Pro ISOs breaks down the licensing logic.
- Architecture matters.The standard ISO is x64. ARM64 devices need a different image entirely, and Microsoft doesn’t hand it out on the consumer download page. If you’re on a Snapdragon laptop, read thex64 vs ARM64 ISO architecture guide before you download the wrong 5.5GB file.
[!WARNING]
Every “Windows 11 ISO download” site that isn’t
microsoft.comis either redistributing Microsoft’s file without permission (which means you can’t verify its integrity) or bundling something you don’t want. Some of them inject a modifiedinstall.wimthat pre-installs remote-access tools. Always verify the SHA-256 hash of any ISO against Microsoft’s published value before you boot from it. If a site doesn’t publish hashes, walk away.
ARM64: The Download Path Nobody Warns You About
Windows on ARM is no longer a curiosity. Snapdragon X Elite and X Plus laptops are mainstream, and the Surface Pro line has been ARM-based for years. But the consumer Windows 11 download page still hands out x64 images by default, and an x64 ISO will not install on an ARM64 device.
Your options for ARM64:
- OEM recovery media — the cleanest path. Dell, Lenovo, HP, and Microsoft all provide recovery images for their ARM devices through their support portals.
- UUP dump — a community tool that pulls official Microsoft update packages and assembles them into a bootable ISO. It’s legitimate, but it requires a script to run and takes 20–40 minutes.
- Windows Insider ISO — Microsoft publishes ARM64 ISOs to Insiders, sometimes.
I’ve built ARM64 installers via UUP dump for a Surface Pro X rebuild and a Snapdragon X Elite test unit. The process works, but it’s not a “click and wait” experience — expect to troubleshoot a failed script run or two. The full procedure, including which UUP options to select and how to handle driver injection post-install, lives in myWindows 11 Arm64 download guide for Snapdragon and ARM devices.
[!KEY_TAKEAWAY]
If you’re on an ARM device, do not download the standard ISO. It will not install. Start with your OEM’s recovery portal — it’s faster and produces a device-specific image with the right drivers baked in.
Home vs Pro vs Enterprise: Which Edition Are You Actually Downloading?
The ISO is universal. The edition that installs is determined at activation time. But the features you get differ dramatically, and some features — BitLocker management, Hyper-V, Remote Desktop host, Group Policy editor — are Pro-only.
For most home users, Home is fine. For anyone who runs VMs, joins a domain, or wants to control Windows Update behavior through Group Policy, Pro is the floor. Enterprise and Education editions require volume licensing or institutional affiliation and aren’t available through the consumer download page.
One nuance worth knowing: if your PC shipped with Windows 11 Home and you want Pro, you don’t need to reinstall. You can upgrade in place through Settings → System → Activation → Change product key. A clean install is only necessary if you’re moving in the other direction or coming from a different OS.
The full edition breakdown — including which features are gated behind Pro, how digital licensing transfers between machines, and what happens when you reinstall on new hardware — is in my Home vs Pro edition selection guide.
LTSC and IoT Enterprise: The Long-Term Options
Windows 11 IoT Enterprise LTSC is the version that doesn’t get feature updates for a decade. It’s designed for kiosks, medical devices, industrial controllers, and point-of-sale terminals. It’s also the version that a certain slice of power users want for their personal machines because it strips out the Store, Copilot, Widgets, and most of the consumer telemetry.
Here’s the reality: LTSC is not available through the consumer download page. You need a volume licensing agreement, an MSDN/Visual Studio subscription, or an OEM channel. The IoT variant is even more restricted — it’s licensed per-device through embedded partners.
I’ve deployed LTSC on a handful of client kiosk systems. It’s rock-solid and genuinely low-maintenance. But I’ve also seen people buy “LTSC keys” from grey-market resellers and end up with licenses that deactivate within 90 days. If you’re considering LTSC for a legitimate deployment, my guide onWindows 11 IoT Enterprise LTSC download options and licensing</a